


Blog
Plastic for Crawlspace: Your Ultimate Guide to Barrier Selection
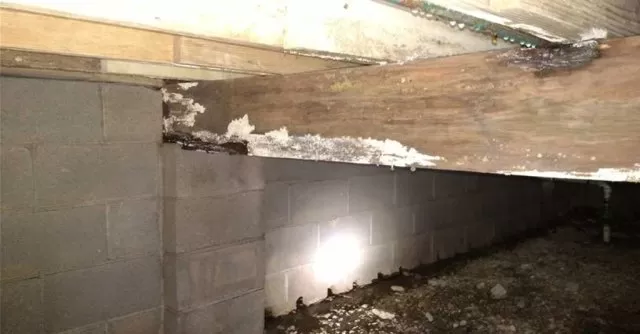
Ever wondered how crucial a role simple plastic can play in your home’s health and moisture issues? That’s right, we’re talking about crawlspace vapor barrier. These unsung heroes are instrumental in controlling moisture levels in entire crawl space of your home.
The significance of these crawl space vapor barriers is often overlooked, yet they have a direct impact on indoor air quality. Without them, you’d be dealing with mold and mildew, which can lead to health issues. So next time you think about home improvements, remember – it’s not just about the visible stuff! The unseen elements like crawlspace vapor barrier also matters big time!
Decoding Functionality of Vapor Barriers
Moisture Seepage Prevention
Vapor barriers, often made from plastic for crawlspace applications, are like the unsung heroes of your home. They work tirelessly behind the scenes to prevent moisture seepage. Think of them as a raincoat for your house. Just like how a raincoat keeps you dry during a downpour, good vapor barrier or barriers keep the underside of your home dry by blocking moisture from the dirt floor crawl space.
Mold and Mildew Growth Prevention
Another superpower of vapor barriers? They’re mold and mildew’s worst enemy. By keeping moisture at bay, these barriers create an environment where the mold spores and mildew simply can’t thrive. It’s like turning off the tap at its source; no vapor transmission no water, no life – simple as that!
Contribution to Energy Efficiency
But wait, there’s more! Vapor barriers don’t just protect your home from moisture and mold. They also contribute towards energy efficiency. How so? Well, by blocking moisture, they help maintain ideal temperature levels which in turn reduces the strain on your HVAC system. This means less energy is needed to heat or cool your home – it’s a win-win situation!
Protection Against Structural Damage
Last but not least, vapor barriers protect against structural damage by preventing wood rot and rusting of metal and concrete components . Imagine them as bodyguards protecting their VIP client (your house) from potential threats (moisture). With this protective shield in place, you can rest easy knowing that costly repairs are kept at bay.
Here’s a quick summary:
Moisture Seepage Prevention: Acts like a raincoat vapor barrier for your house.
Mold & Mildew Growth Prevention: Creates an unfavorable environment for mold and mildew growth.
Contribution to Energy Efficiency: Helps maintain ideal temperature levels reducing strain on HVAC systems.
Protection Against Structural Damage: Prevents wood rot and rusting of metal components.
So next time when you think about what’s underpinning the integrity of your home structure while keeping it cozy too – remember it’s probably that humble piece of plastic in the crawlspace doing all the heavy lifting!
Choosing Perfect Plastic for Your Crawlspace
Determining Factors
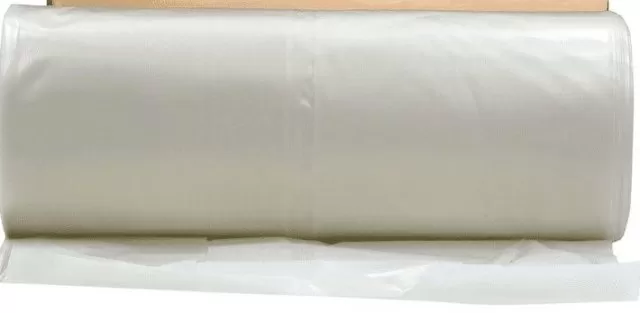
Choosing the right vapor barrier is like picking out a suit. You want something that fits just right and can stand up to whatever life throws at it. The thickness, durability, and permeability rate of the plastic are all key factors to consider.
Thickness: This is measured in mils (1 mil = 0.001 inch). A thicker barrier, say 10-20 mils, can provide better protection against moisture and pests.
Durability: It’s not just about thickness though! The material should be tough enough to resist tears and punctures for you crawl space.
Permeability Rate: This refers to how much water vapor can pass through the material. Lower rates mean less moisture getting in.
Quality Over Quantity
Just like you wouldn’t buy a cheap suit off a sketchy website, don’t skimp on your vapor barrier. Pay attention to the quality of the material and the reputation of the manufacturer. A well-made product from a reputable company will last longer and perform better than a cheaper alternative.
Local Climate & Soil Conditions
Think about where you live. Is it hot? Humid? Dry? All these factors affect what type of plastic you need
For example:
In wet climates, go for a low-permeability barrier to keep out as much moisture as possible.
If termites are common in your area, choose a product with added pest control properties.
Building Codes & Regulations
Last but not least, don’t forget about building codes and regulations! They might seem annoying but they’re there for good reason: safety and efficiency. Make sure any plastic you choose meets local requirements.
To sum up:
Consider factors like thickness, durability, permeability rate and ground cover.
Don’t compromise on quality or manufacturer reputation.
Take into account local climate & soil conditions.
Always check building codes & regulations before making a decision.
So there ya have it! By keeping these points in mind, you’ll be well on your way to choosing perfect plastic – one that keeps it dry, safe, and protected from pests no matter what Mother Nature decides to throw at it!
Pros and Cons: Comparing Crawlspace Plastics
Polyethylene Plastic
Polyethylene sheeting plastic is the most common type of plastic used for crawl space vapor barriers. It’s like the old reliable, always there when you need it. But let’s dig a bit deeper.
Cost-effectiveness: You can’t beat polyethylene for affordability. It’s your budget-friendly option.
Performance: Don’t let the price tag fool you, this plastic holds its own.
Lifespan: Expect a good couple of years from this bad boy. With proper care, it can last up to 10 years.
Environmental Impact: Here’s where things get sticky. Polyethylene isn’t exactly Mother Nature’s best friend. It takes forever (literally hundreds of years) to decompose.
Reinforced Polyethylene Plastic
Next up we’ve got reinforced polyethylene, a.k.a polyethylene on steroids.
Cost-effectiveness: A tad pricier than regular polyethylene but still won’t break the bank.
Performance: This stuff is tough! Thanks to its reinforced structure, it offers superior strength and tear resistance.
Lifespan: Longer lifespan than regular polyethylene—think 20+ years if maintained properly.
Environmental Impact: Same story as regular polyethylene—it’s not winning any green awards.
Cross-Laminated Polyethylene Plastic
Last but not least, cross-laminated polyethylene enters the ring.
Cost-effectiveness: Okay, so this one may make your wallet wince a little. But remember, you’re paying for quality here!
Performance: Top-notch! Its cross-laminated construction provides exceptional durability and puncture resistance.
Lifespan: you’re looking at 25+ years easy peasy lemon squeezy!
Environmental Impact: Unfortunately, just like its cousins above, it’s slow to decompress in landfills.
So which one should you choose? Well that depends on what you value most: cost-efficiency or performance? Longevity or environmental impact? Remember though that investing in quality now could save you money down the line. And hey maybe someday soon we’ll have an eco-friendly option that ticks all the boxes!
But until then… keep crawling!
Installation Guide: Crawlspace Vapor Barrier
Prep Work
Before you even think about unrolling that plastic vapor barrier there’s a bit of prep work to do. Think of it like prepping for a paint job – the better the prep, the better the end result. Start by giving your space a good clean. Sweep out any debris, dust bunnies, and anything else that doesn’t belong down there.
Next up is leveling the floors. You want a nice flat surface to lay your barrier on. This might mean filling in any dips or smoothing out any bumps. Check for damages too – things like cracks or holes in the walls or floor need fixing before you move onto the next step.
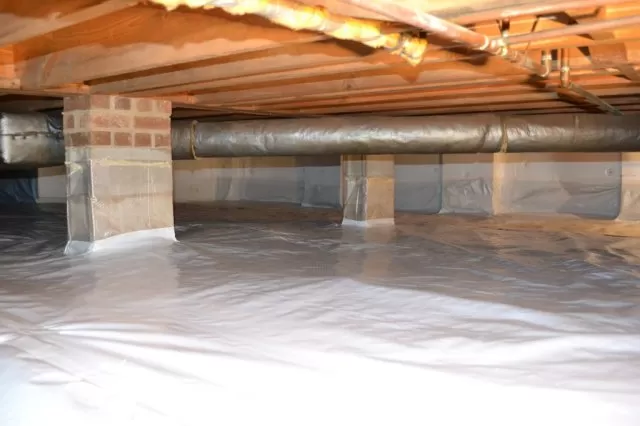
Laying Down The Barrier
Now comes the fun part – laying down your plastic vapor barrier! It’s not rocket science but it does require some technique:
Unroll your plastic on one side
Smooth it out as you go, making sure it’s flat against the surface.
Keep going until you’ve covered the whole area.
Remember, this isn’t a race – take your time to ensure everything lays flat and all the products and seams are snug.
Sealing Edges And Overlaps
Once you’ve got your barrier laid down, it’s time to seal those edges and cover the overlaps. This is key because if moisture can sneak through these gaps, well… what was the point of all that hard work? Use a strong adhesive tape designed specifically for this task and make sure every edge and overlap space on perimeter wall is sealed tight.
Post-Installation Checks
Finally, after all that hard grafting (and probably more than a few swear words), it’s time for some post-installation checks:
Is every square inch of your space covered?
Are all edges and overlaps sealed correctly?
Can you see any potential problem areas?
If everything checks out then congratulations! You’ve successfully installed a new vapor barrier.
This process may seem daunting at first glance but remember – preparation is key! Take care during each step of installation and soon enough you’ll have an effective moisture vapor barrier protecting your home from unwanted moisture damage.
Maintaining Lifespan of Crawl space Plastics
Regular Inspection Routines
The first step in extending the lifespan of your plastics is to establish a regular inspection routine. A bit like brushing your teeth or taking out the trash, it’s one of those chores that can’t be put off. You’ve got to keep an eye out for early signs of wear and tear. These could be small cracks, discoloration, or even slight changes in texture. The sooner you spot these issues, the quicker you can nip them in the bud.
Set a monthly reminder on your phone or calendar.
Equip yourself with a flashlight and gloves.
Look closely at each plastic sheet for any visible damage.
Cleaning Methods
Keeping your plastics clean is another crucial aspect of maintenance. But remember, not all plastics are created equal! Different types require different cleaning methods:
Polyethylene: Use warm water with mild dish soap.
PVC: Wipe down with a cloth dampened in vinegar solution (1 part vinegar: 4 parts water).
Polystyrene: Clean using non-abrasive detergent and soft cloth.
Remember to dry thoroughly after each cleaning session!
Repair Techniques
Minor damages? No sweat! Small tears and holes can often be fixed without needing professional help:
Use clear plastic tape for minor rips.
Apply UV-resistant duct tape for outdoor repairs.
Consider using a plastic welding kit for more severe damage.
Always ensure the area is clean before starting any repair work!
Replacement Over Repair
Sometimes though, despite our best efforts, replacement becomes inevitable. So how do you know when it’s time to let go?
Frequent repairs becoming necessary
Large tears that cannot be effectively sealed
Noticeable mold growth on or under the plastic
Persistent unpleasant odors emanating from below
Don’t fret about replacements! It’s just part of maintaining a healthy home environment!
By following these steps and keeping up with regular maintenance routines, you’ll not only extend the life of your space but also improve overall home health and safety! Remember – prevention is better than cure!
Cost vs Benefit: Evaluating Crawlspace Plastics
Upfront Costs versus Long-term Savings
It might seem like a hefty investment initially. But, let’s break it down to the nitty-gritty. A typical plastic installation can range anywhere from $500 to $1500 depending on the size of your home and the quality of plastic you opt for. Now, consider this – crawlspaces without proper insulation can lead to significant energy losses. With well-installed plastic, you could save up to 15-20% on your annual heating and cooling costs! That’s a chunk of change back in your pocket every year.
Weighing Costs against Potential Expenses
No one likes the smell of dampness or worse, mold in their homes. Untreated moisture is often a breeding ground for mold which can lead to expensive remediation and even structural repairs. Consider this:
Mold remediation: $500 – $3000
Structural repairs due to rot: $5000 – $10000
Compared with these potential expenses, investing seems like a no-brainer!
Lifespan and Maintenance Needs
Not all are created equal. Here’s how they stack up:
| Type | Average Lifespan | Maintenance |
|---|---|---|
| Polyethylene (6 mil) | 5-10 years | Low |
| Reinforced Polyethylene (12 Mil) | 20+ years | Medium |
| Encapsulation System (20 Mil) | Lifetime of house | High |
While encapsulation systems have the highest upfront cost, they offer superior durability and virtually zero maintenance needs.
Improved Home Health & Resale Value
Who doesn’t love a healthy home? Plastics reduce moisture levels significantly leading to improved indoor air quality. It’s like giving your home a breath of fresh air! Plus, savvy buyers recognize the value of an encapsulated space – it could boost your resale value by several thousand dollars.
So there you have it folks! The cost-benefit analysis shows that what might seem like an upfront expense is actually an investment into long-term savings, better health and increased property value.
Wrapping Up on Plastic for Crawl space
We’ve journeyed through the nitty-gritty of plastics, from understanding vapor barriers to choosing the right one. You’re now armed with knowledge about their pros and cons, how to install them, ways to prolong their lifespan, and how they stack up cost-wise.
Vapor barriers are a no-brainer for you. They keep moisture at bay, preventing mold growth and structural damage. But not all plastics are created equal. It’s crucial to choose quality material that can withstand the harsh conditions down there.
Installation might seem daunting but with our guide, you’ll have it done in no time. And remember, maintenance is key! Regular checks ensure your barrier stays effective longer.
When it comes down to dollars and cents, investing in a sturdy plastic barrier saves you from costly repairs down the line. So really, it’s worth every penny!
Ready to give your space a makeover? Let’s do this!
FAQs
What type of plastic is best for my crawl space?
Polyethylene plastic sheets with thickness ranging from 6-20 mil are ideal as they provide good shape, more space, great durability and moisture resistance.
How often should I check my crawl space plastic for maintenance?
Perform regular inspections annually or anytime you suspect water intrusion or damage.
Does installing a vapor barrier increase my home value?
Yes! Well-maintained it can boost your crawl space and property value by control moisture and preventing structural damages caused by moisture.
Is professional installation necessary or can I do it myself?
While professional installation guarantees optimal results, our guide equips you with enough know-how to DIY if preferred.
Can I use any kind of plastic as a vapor barrier in my crawl space?
Nope! Only certain types like polyethylene are suitable due to their high resistance against moisture and tear.