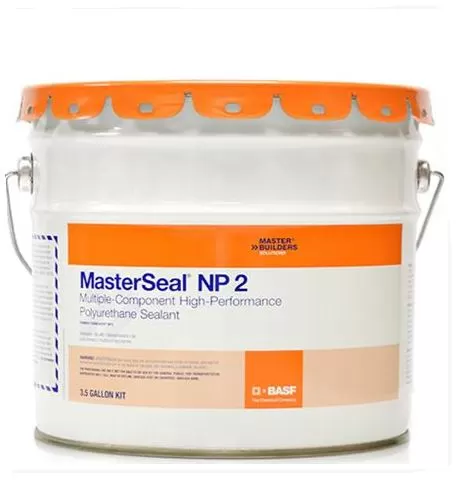
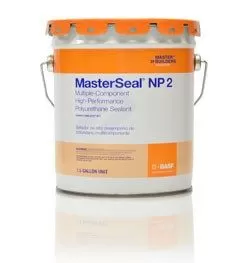
Masterseal NP2 3 Gallon Pail
$119.05
• Movement capability of 50% adds protection
against unanticipated movement
• Weather resistant for long-lasting
weathertight seals
• Easy to gun and tool to speed up application
and make neater joints
• MasterSeal 905 accelerator available for use
in cold climate applications to help speed initial
cure
• No primer required for most construction
materials, lowering installation costs
• Wide temperature application range makes
MasterSeal NP 2 suitable for all climates
• UL listed; Passes 4–hour, 4–inch, fire and
hose stream test when used with Ultra Block
or mineral wool
• Suitable for water immersion with documented
performance in wet areas
• Chemical cure allows for faster turnaround
time
• Bulk packaging results in less waste
• Long pot life provides extended working time
• Formulated to withstand pedestrian and
vehicular traffic
Masterseal NP2 3 Gallon Pail
HOW TO APPLY
JOINT PREPARATION
1. The product may be used in sealant joints designed in accordance with SWR Institute’s Sealants – The Professional’s Guide.
2. In optimal conditions, the depth of the sealant should be ½ the width of the joint. The sealant joint depth (measured at the center) should always fall between the maximum depth of ½” and the minimum depth of ¼”. Maximum
recommended joint width is 3″.
Masterseal NP2 3 Gallon is a multi-component polyurethane product.
Compliances:
• ASTM C 920, Type M, Grade NS, Class 25, use NT,
T, A, M, O* and I
• Federal Specification TT-S-00227E, Type II, Class A
• Corps of Engineers CRD-C-506
• Canadian Standards Board CAN/CGSB-19.24-M90,
Classification MCG-2-40-A-N, No. 81029
• CFI accepted
• Underwriters Laboratories Inc.® classified
(fire resistance only).
* Refer to substrates in Where to Use.
3. In deep joints, the sealant depth must be controlled by closed cell backer rod or soft backer rod. Where the joint depth does not permit the use of backer rod, a bond breaker (polyethylene strip) must be used to prevent
three-point bonding.
4. To maintain the recommended sealant depth, install backer rod by compressing and rolling it into the joint channel without stretching it
lengthwise. Closed cell backer rod should be about 1⁄8″ (3 mm) larger in diameter than the width of the joint to allow for compression.
Soft backer rod should be approximately 25% larger in diameter than the joint width. The sealant does not adhere to it, and no separate bond breaker is required. Do not prime or puncture the backer rod.
SURFACE PREPARATION
Substrates must be structurally sound, fully cured, dry and clean. Substrates should always be free of the following: dirt, loose particles, oil, grease, asphalt, tar, paint, wax, rust, waterproofing or curing and parting compounds, membrane materials and sealant residue.
CONCRETE, STONE, AND OTHER MASONRY
Clean by grinding, sandblasting or wire brushing to expose a sound surface free of contamination and laitance.
WOOD
New and weathered wood must be clean, dry and sound. Scrape away loose paint to bare wood. Any coatings on wood must be tested to
verify adhesion of sealant or to determine an appropriate primer.
METAL
Remove scale, rust and loose coatings from metal to expose a bright white surface. Any coatings on metal must be tested to verify adhesion of sealant or to determine an appropriate primer.
PRIMING
1. MasterSeal NP 2 is considered a non-priming sealant, but special circumstances or substrates may require a primer. It is the user’s responsibility
to check the adhesion of the cured sealant on typical test joints at the project site before and during application. Refer to product data sheet on MasterSeal P 173 and MasterSeal P 176, and consult Technical Service for additional
information.
2. For immersion applications, MasterSeal P 173
must be used.
3. Apply primer full strength with a brush or clean cloth. A light, uniform coating is sufficient for most surfaces. Porous surfaces require more
primer; however, do not over-apply.
4. Allow primer to dry before applying MasterSeal NP2 3 Gallon.
Depending on temperature and humidity,
primer will be tack-free in 15–20 minutes. Priming
and sealing must be done on the same day.
MIXING
1. MasterSeal NP 2 is a multi-component system with a configuration of Part A, Part B and a color pack.
2. Transfer entire contents of Part B to Part A container using a spatula or margin trowel.
3. Part B must be mixed thoroughly with Part A. Before adding pigment, scrape sides of container to ensure complete mixing of Parts A and B. With a slow-speed drill and a sealant mixing paddle, mix 4–6 minutes. Keep the paddle blade below the surface of the sealant to avoid whipping air
into the sealant.
4. Transfer the entire contents of one MasterSeal 900 pigment can into the mixed Part A and B. Use a spatula or knife to remove all the pigment from the container. Continue mixing with a slow-speed drill and slotted paddle until color is uniform. During the process, scrape the sides and bottom of the mixing container several times to obtain a complete mix.
5. The pot life of mixed MasterSeal 905 accelerator is influenced by temperature. MasterSeal 905 accelerator may be added to adjust the initial
cure rate.
APPLICATION
1. Except when unusual job conditions dictate the use of knife or spatula, apply MasterSeal NP 2 by professional bulk gun loaded at the jobsite. Fill joints from the bottom up to the exterior face by holding a properly sized nozzle against the joint bottom.
2. Dry tooling is recommended. Proper tooling results in the correct bead shape, neat joints, and optimal adhesion.
3. Best practices dictate that all caulking and sealing be done when temperatures are above 40 °F (4 °C) to avoid application to moisture laden surfaces. Moisture on substrates will adversely affect adhesion.
4. Application may proceed as low as 40 °F (4 °C) if there is certainty that substrates are completely dry, free of moisture and clean as described under Surface Preparation.
CURING
The cure of Masterseal NP2 3 Gallon varies with temperature and humidity. The following times assume 75 °F (24 °C), 50% relative humidity, and a joint 1/2” (13 mm) in width by 1/4″ (6 mm) in depth.
– Skins: within 3–4 hours
– Full cure: approximately 1 week
CLEAN UP
Immediately after use and before sealant has cured, clean equipment with MasterSeal 990 or xylene. Cured sealant may be removed by cutting with a sharp-edged tool. Remove thin films by abrading
| Weight | 32.50 lbs |
|---|---|
| Dimensions | 14 × 14 × 14 in |
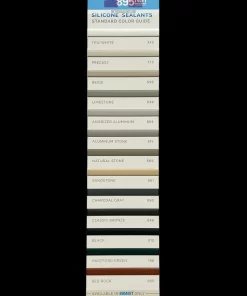
| Color | Tint Base, Limestone |
Related products
All Products
Air and Vapor Barrier
Aluminum


